


A wall-mounted pergola is one of those additions that looks simple from the street… until you live with it.
On paper, it’s straightforward: bolt to the house on one side, posts on the other, and you’ve got instant shade. In real life, the “instant” part depends on a handful of small decisions that decide whether the space feels like an outdoor room you’ll use every week, or a covered patch you forget about.
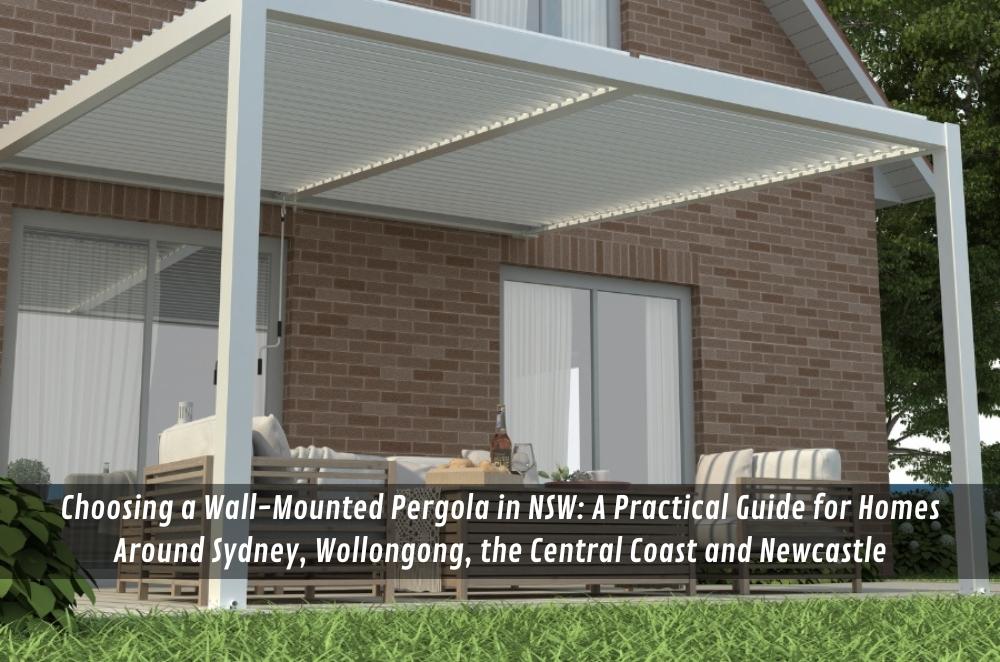
If you’re looking at wall-mounted options around Sydney, down to Wollongong, or up through the Central Coast to Newcastle, this guide will help you sort the important stuff from the noise.
What “wall-mounted” really means (in plain English)
A wall-mounted pergola (also called an attached pergola) connects to the house and extends out into the yard. The house side is supported by a connection point at the wall, while posts carry the outer edge.
That’s it.
But that connection point is also where most headaches start if it’s not planned properly—especially when rain is coming in sideways, and the wind’s got a bit of attitude.
You’ll usually choose a wall-mounted pergola because you want the covered area to feel connected to indoor living. It’s right there off the kitchen, lounge, or back door. No awkward gap. No “walk across the wet pavers to get under cover”.
And when it’s designed well, it can make a smaller backyard feel bigger because your usable space moves outward.
Don’t start with products. Start with how you’ll use it.
People often begin by picking a roof style or a colour.
I get it. That part’s fun.
But the better starting point is standing outside and imagining a normal week. Not the party you might have once a year—your Tuesday night BBQ, your Saturday morning coffee, the school bags getting dumped by the door.
Ask yourself:
-
Where do people naturally walk?
-
Where does the sun hit late afternoon?
-
Do you want a bright indoor room behind the pergola, or are you happy to trade light for shade?
-
When it rains, where does the water currently go?
One little line that matters more than most: a pergola should make everyday living easier.
Short and sweet.
Quick space checks that save regret
-
If you want a dining table, give yourself enough room for chairs to move without hitting posts.
-
If you want a BBQ, leave breathing space for heat, smoke, and safe clearance.
-
If the back door is the main path, keep the walkway dry and uncluttered.
-
If the area gets hammered by afternoon glare, plan for shade that actually blocks it.
A pergola can look perfect in a photo and still be annoying to live with.
Frames: aluminium vs timber (what actually changes for you)
Most wall-mounted pergolas in NSW land in one of two camps: aluminium frames or timber frames.
Both can work. Neither is “the best” in every yard.
The trick is choosing the one that fits your climate, your home, and how much maintenance you’ll realistically do.
Aluminium frames
Aluminium is popular because it stays straight. It doesn’t twist or swell like timber can.
If you’re anywhere near salt air—parts of the Illawarra, the Central Coast, and around Newcastle—this matters. Coastal conditions can be unforgiving. The finish and fixings are doing a lot of work behind the scenes.
It’s also a good fit if you want a clean look and you’d rather not spend weekends sanding or resealing.
Timber frames
Timber has that warm feel, especially against brick or weatherboard. Done right, it can look genuinely beautiful.
But timber moves. It needs care. Not heroic levels of care, but regular attention—checking joints, resealing, and keeping water away from places it can sit.
If you love timber, go in with your eyes open. It’s more like owning a deck than buying a piece of outdoor furniture.
Practical opinion #1: Choose the material you’ll actually maintain, not the one you hope you’ll maintain.
Roof choice: where comfort is decided
This is the decision that changes everything: light, heat, rain protection, and how the area feels at different times of day.
Solid roof (full cover)
A solid roof gives you the most reliable cover from rain.
It also makes the space feel more “room-like”, which many people love.
The downside is simple: you’ll likely lose some daylight inside. If your pergola sits over sliding doors or kitchen windows, you can feel the difference.
If you go solid, drainage and flashing become non-negotiable. A solid roof without a proper water plan can turn into drips, stains, and constant fiddling.
Louvred roof (manual or motorised)
A louvred roof is the “control” option. You can open it for airflow and light, and close it down when you want shade.
In a hot NSW summer, airflow can be the difference between enjoying lunch outside or retreating indoors.
Rain protection can be good when closed, but it depends on design and installation. Heavy rain and wind can still find ways around edges, so it’s worth thinking through where the weather actually comes from on your property.
If you want to see typical wall-mounted configurations and roof types in a local range, you can browse the Unique Pergolas products to get a feel for what’s commonly available.
Light-transmitting panels
Panels that let light through can be a good middle ground: you keep brightness inside while still cutting harsh sun.
But they can be noisy in heavy rain, and they may show grime quickly if you’re under trees. In leafy suburbs, cleaning access matters more than people expect.
Here’s a handy way to decide:
Do you want shade-first, or light-first?
Pick one, and it will narrow your options fast.
Wind, storms, and “that one corner that always cops it”
Around Sydney and the coast, you can have a sheltered courtyard two streets back from the beach… or a backyard that catches every gust like a kite.
If your space is exposed, wind planning isn’t optional. It affects post spacing, bracing, roof type, and how the pergola connects back to the house.
Also, if you plan to add outdoor screens (pull-downs or fixed), treat them as part of the wind equation. A screen can be brilliant for comfort, but in the wrong spot, it can act like a sail.
A calm day won’t tell you much.
Pay attention to how the space feels in the “normal bad weather” for your area.
The wall connection: where most future problems are born
If there’s one unsexy detail that deserves attention, it’s how the pergola meets the house.
This connection usually needs:
-
Solid fixing into a suitable structure
-
Flashing to direct water away from the wall line
-
A sensible plan for movement and expansion
-
Clean drainage so water doesn’t sit where it shouldn’t
Here’s a simple “lived reality” check: after heavy rain, you should not see water tracking along the wall behind the pergola.
If you do, it rarely stays small.
Council approval in NSW: don’t leave it until the end
Approval requirements vary depending on size, location, setbacks, and site conditions.
Attached structures can trigger extra checks because they change how loads transfer into the home and how water runs off the roof.
If you’re near boundaries, on a sloped site, dealing with easements, or in a heritage context, it’s worth getting clarity early.
To make those conversations easier, gather:
-
Rough dimensions (width, projection, height)
-
Boundary distances
-
Photos of the wall where it will attach
-
Notes on gutters/downpipes and where water currently runs
That’s usually enough to avoid chasing your tail later.
Practical opinion #2: It’s better to do a quick approval check early than redesign when you’re already mentally committed.
DIY vs installed: the honest version
Some people are handy and enjoy a DIY build.
Some people are handy but don’t want a half-finished pergola hanging around for months.
And some sites are simply not “DIY friendly” even if the product is.
DIY tends to suit you if:
-
Access is easy, and the ground is straightforward
-
You’re confident working safely at height
-
You have time to be precise, not rushed
-
You’re comfortable managing flashing and water details
Installed tends to suit you if:
-
You’ve got slope, tight access, or tricky wall conditions
-
The pergola spans doors/windows where small errors are obvious
-
You want clearer accountability around the wall connection and water management
If you’ve ever tried to “just quickly” fix a leak at a wall junction, you already know why this matters.
Operator experience moment (what I’ve seen catches people out)
One thing I’ve noticed is that people underestimate how much a pergola can change the feel of the indoor room behind it.
I’ve seen outdoor spaces that look fantastic, but the kitchen becomes noticeably darker in winter. And once it’s built, it’s not the kind of thing you casually adjust. A quick mock-up—marking the roof line on the wall and watching the afternoon light for a day—can save a lot of second-guessing.
Australian SMB mini-walkthrough (a local-style scenario)
A small clinic near the Central Coast wants a shaded waiting nook outside.
They don’t want it to feel gloomy indoors.
First, they watch where the sun hits between 10 am and 3 pm.
Then they choose a roof option that blocks glare but still lets in light.
They plan drainage, so rain doesn’t run across the entry path.
Finally, they add a wind shelter on the side that cops the breeze most days.
Same steps for a home. Different furniture.
A simple checklist before you commit
If you’re comparing options, this checklist keeps you focused on the things you’ll feel later.
-
How will water leave the roof, and where will it end up?
-
What’s happening at the wall line (fixing method + flashing)?
-
Will the roof darken the room behind it more than you’re comfortable with?
-
Is the site exposed to wind, and how is bracing handled?
-
Can you clean gutters and roof surfaces without a ladder circus?
-
Are you adding screens, lighting, or heating now—or later—and how will that be fitted?
One more: if something looks too “clever” to be serviced easily, it usually is.
Making it look like it belongs
A wall-mounted pergola can look like an afterthought if it ignores the home’s lines.
Small choices help it feel built-in:
-
Align roof lines with existing eaves where possible
-
Match colours to window frames or trims
-
Keep post placement tidy (and out of the main walkway)
-
Plan lighting early so you’re not running cables as an after-job
Simple designs often age better than complicated ones.
And they’re easier to live with.
Practical opinion #3: Get the fundamentals right, then stop tinkering. Most people don’t need every upgrade.
Key Takeaways
-
A wall-mounted pergola works best when the roof choice, drainage, and wall connection are planned together.
-
Decide early if you’re shade-first or light-first, because it changes the whole design.
-
In coastal and exposed NSW spots, wind and corrosion resistance deserve proper attention.
-
Approval requirements vary—collect basic site info early to avoid late redesigns.
-
Choose materials and features you’ll still be happy maintaining in five years.
Common questions we hear from Australian businesses
How do we set a budget without ending up with something we don’t really need?
Usually, the cleanest approach is to cost the “must-haves” first: structure, roof type, wall connection, and drainage. Then add extras (like screens or motorisation) only if the base design already solves your comfort problems. Next step: write down what you want the space to do on an average week—shade at 5 pm, dry walkway, airflow—then keep quotes focused on that. In coastal NSW areas, allowing for better-grade finishes and fixings can save replacement pain later.
Are louvred roofs worth it around Sydney, or are they more hassle than they’re worth?
It depends on whether your main issue is trapped heat or direct sun. If you get a stuffy, still pocket of air under cover, louvres can be a real quality-of-life upgrade because you can open them and let heat escape. Next step: stand in the space on a warm day and check how the air behaves. If it feels hot and flat even in shade, airflow control may matter more than a fully solid cover.
What’s the most common “approval surprise” people run into in NSW?
In most cases, it’s setbacks, drainage, and sloped sites. People plan the roof and forget how water will move once it’s attached to the house. Next step: measure your rough height and projection, note boundary distances, and take a few clear photos of the attachment wall and existing gutters. That’s often enough to get a quick steer early, especially when local rules vary between councils.
How do we know we’ve chosen the right setup once it’s built?
Usually, you’ll know because you actually use it—weeknight dinners outside, a dry path in the rain, or a space that stays comfortable in summer. Next step: before building, write down two or three “use moments” you want (like “BBQ without glare” or “kids outside when it’s drizzling”), then design the roof and screens around those. In breezy coastal areas, plan shelter on the side the wind hits most often, not just where it looks nice.